Showing posts with label Watercolor Series. Show all posts

Saturday, January 28, 2012

Organizing Photos for Paintings

In response to many people asking me about my photographs that I use for my paintings:
 This idea was not mine, but rather my Grandmother's.  Who taught my father, who taught me.  I'm sure it's nothing new and probably lots of people have done it before.  It's probably not done nowadays  as much, with everything being digital, but never the less here it is.
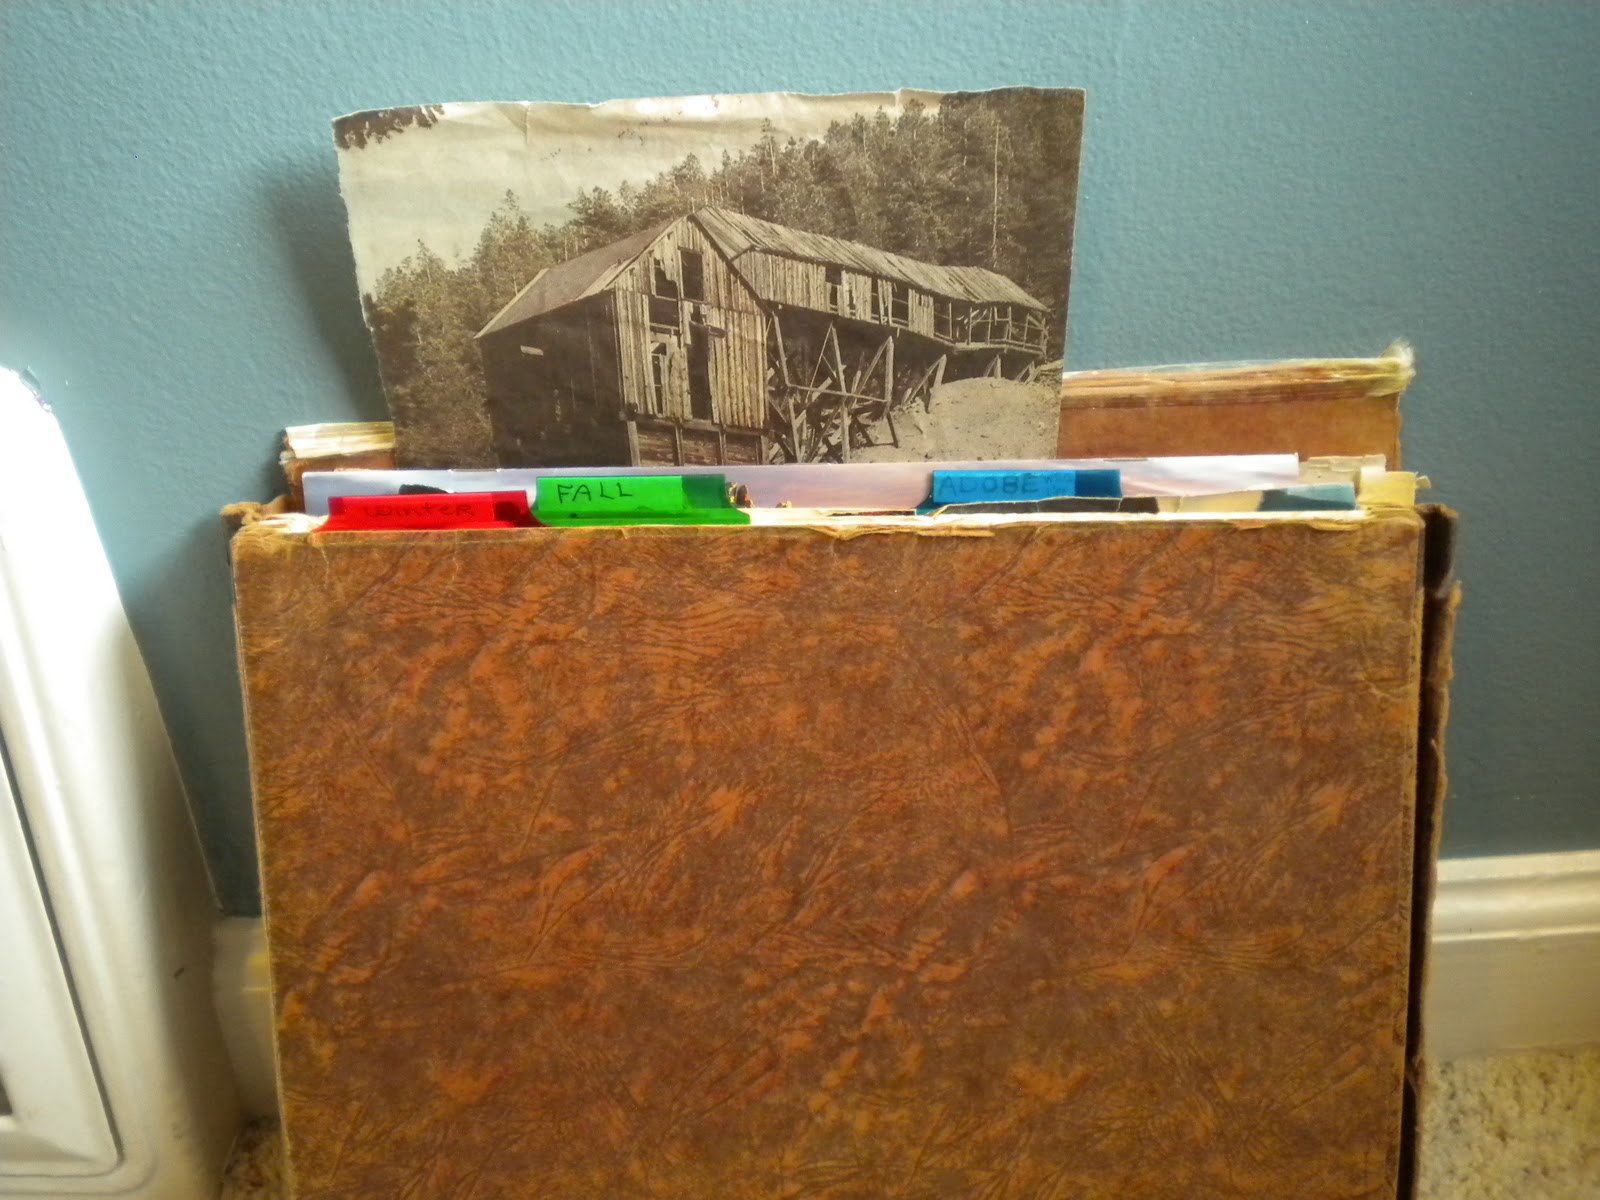
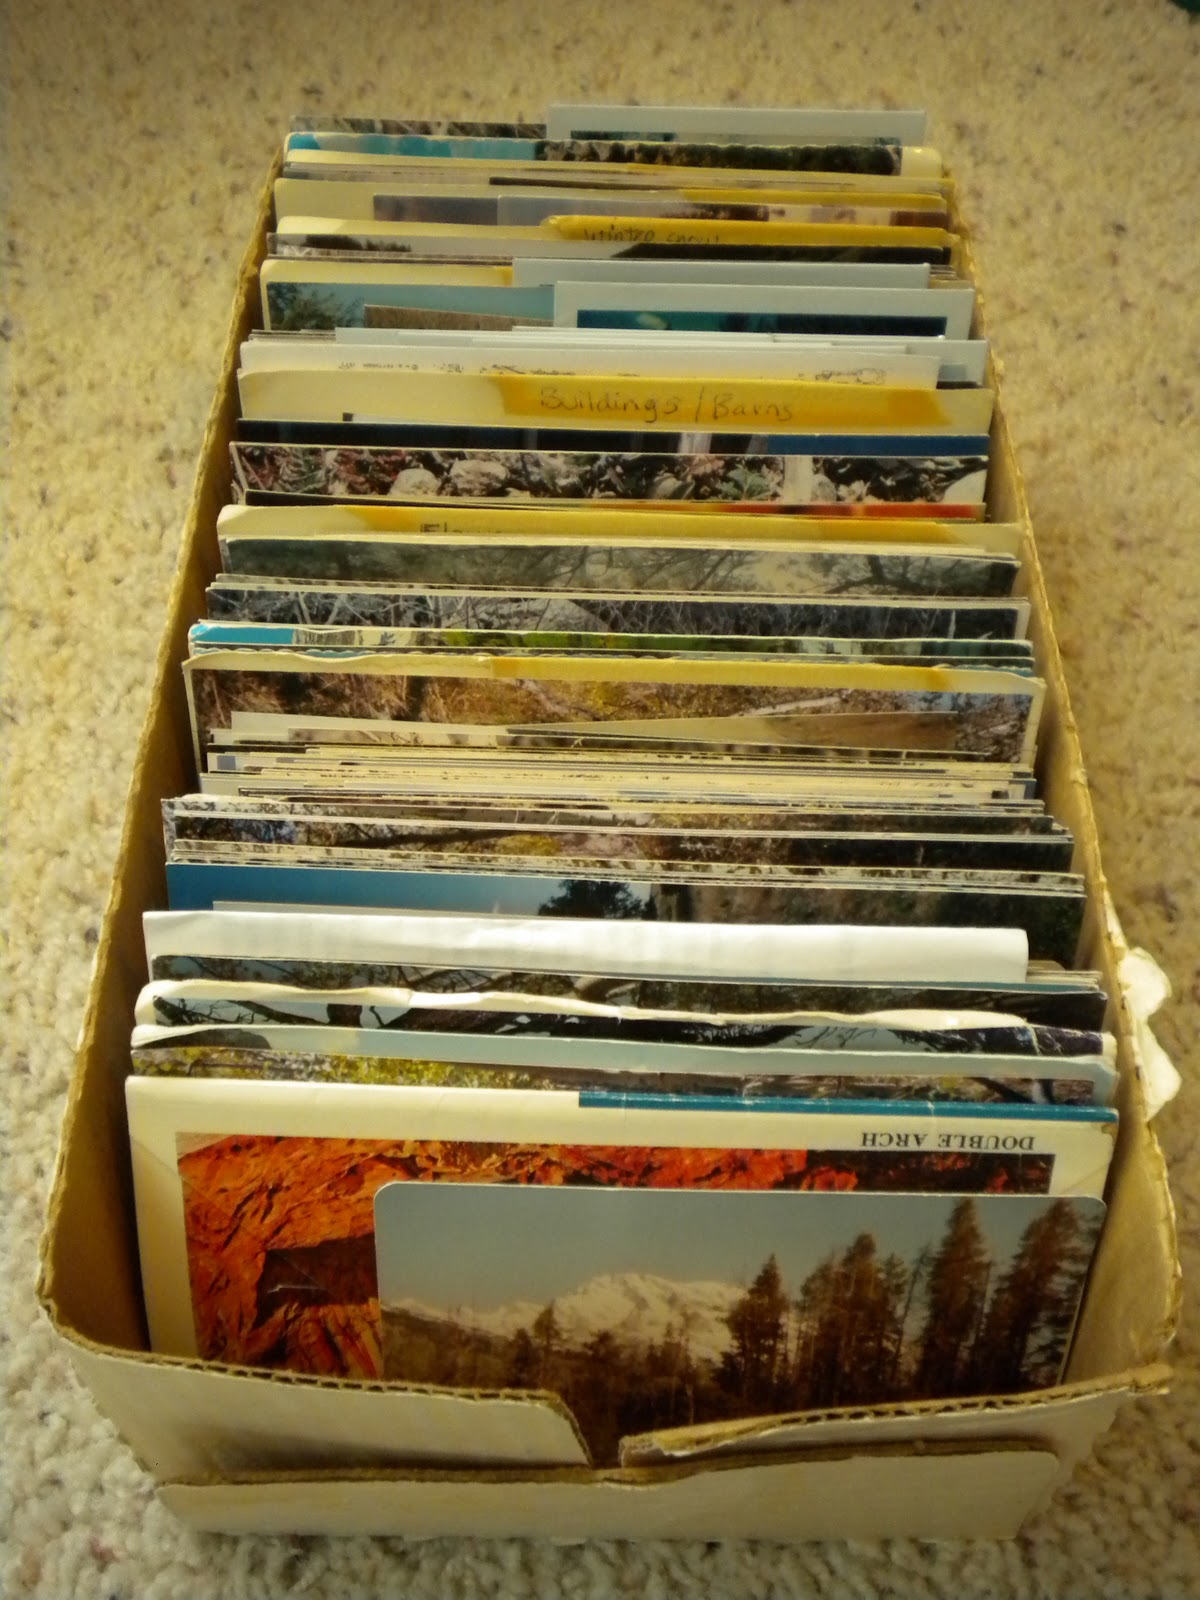
Find a box that fits the largest size photographs you have.   Make divider tabs and organize your photos.  Soon you'll find that you start taking photos of certain things like rocks, water, streams, trees, barns, mountains etc. so you can fill your box.  Maybe you already have a bunch.  I like having tangible photos rather than having them on a computer.
 This box shown here had cookies in it I believe.  I remember helping my Dad gather and organize these photos.
He used the large size recipe cards with tape at the top to make the divider tabs.  These photos are from my grandmother and Dad.  It's quite a collection.  I had started making my own from a shoe box, but after my father passed away, I inherited his.  I'm in the process of combining them.

 So now when I want to do a painting, I can choose my subject matter, go to that category and pull out photos.

  My father also had a portfolio thing, that he kept  photos from magazines and calendars organized.  It's falling apart now.  I have one of my own too and need to get rid of this one as it is really hanging on by a thread....or rather with crumbling tape.  But I'm having a hard time parting with this one.


Thursday, November 3, 2011

Watercolor Wednesday Week 36....A day late

I did two different paintings from the same photograph of some grape vines.
For the first painting, I started out by painting some fall colors on my paper and letting it dry completely and then  painted a darker color over the top and then scraped out my vines and leaves with the side of an old credit card and blotted some areas with a tissue.  There was also some salt sprinkled on the first wash and left on the paper when I painted the dark color over the top so the salt affected both layers, but because the brush pushed the salt around during the second wash it affected the painting in a diffrent  spot.

 This is another version of the same technique:


Here is the other grape vine picture:


Wednesday, October 12, 2011

Watercolor Wednesday Week 33

HAPPY PPF !!!!!

Lesson 2: A "Painting" versus a "Picture."

A Painting is:
A shape with a value change, painted with a variety of color, showing the Artistic Touch while maintaining a strong impact area and sense of unity.

A picture is:
A barn, A wagon, a tree, a window with grass and clouds.

"If you want to create a true painting, learn to focus on a variety of shapes, tonal values and colors while maintaining a strong impact area and sense of unity" Tom Lynch.

You can view my other paintings HERE  or see my Watercolor series HERE.

Wednesday, October 5, 2011

Watercolor Wednesday Week 32


 Lesson 1:  Art should be about stimulating the viewer's imagination, not showcasing the facts.  Art offers a chance to escape the world of detail and data- Tom Lynch.
 By giving the "suggestion" of flowers and trees instead of painting every branch, leaf and petal.  Rely on color shapes and patterns to make a painting.
 This could be a spring or late summer early fall picture.  What do you think?  Its 15"x11" and  I used salt and a sea sponge for texture.
View my other paintings HERE.

Saturday, July 30, 2011

Stretching Watercolor paper

Anyone who has ever painted with watercolors  (either as a kid or adult) knows that the paper "buckles" when it gets wet.  It makes the paint roll off of the high parts and settle in low parts.  Making for a not so nice finished look.  I'll show you how to solve this problem.  Stretching your paper. I use Arches 140 #(pound)  cold press paper.  For beginners I'd recommend using a quarter sheet and work your way up to a full sheet.  I fold and tear the paper to keep the deckled edge. I fold the (full sheet) in half one way and then fold it the other way and then tear it.   You'll then have 2 half sheets.  Then I take one of the half sheets and fold it in half one way and then the other way and then tear it.  Leaving me with a quarter sheet.
Then place your desired sheet of paper in a bathtub with warm water for about 10-15 minutes.  Turning it over about half way through.
 
When it's finished soaking take it out of the water and hold it up over the tub, letting the water drip off until the dripping stops. (About 10 or 15 seconds)  Then place the paper on your board.  HERE is where I describe what kinds of boards are suitable for Watercolor paper.  I usually smooth it out, making sure it is flat on the board.


Then staple the paper onto the board.  Keep the staples about a 1/4 inch from the edge and about 1 and half to 2 inches apart.


Your paper should look like this when it's done. (This is a half sheet, not a quarter sheet)
IMPORTANT:  MAKE SURE THE BOARD LIES FLAT WHILE IT IS DRYING.  Also keep it out of direct sunlight and away from heaters and air conditioners.  Standing it up makes the water drip down the board keeping the lower part wet longer and the top part dry first, pulling the paper away and sometimes out of the staples.  I also once set my paper on a stool (flat) and the next morning the whole board was bowed.  So make sure it is on a table or on the floor.

When it's dry, you can paint your picture, and when you are finished, use a a pocket knife (See the above link) to remove the staple by gently sliding it under the staple and the board and wiggling it side to side until it comes loose.  Usually about 90% of the staple come out entirely but I sometimes have 3 or 4 that I have to pull the rest of the way out with a pair of needle nose pliers.
See the other Watercolor Series HERE.


Thursday, July 14, 2011

Watercolors: How to get started

What you'll need:


Staple gun--No. 101 or 201 Swingline or equivalent (1/4" staple) I have a stanley lightweight TR45
Board--suggested 18”x 24” x 1/4 “ plywood or 3/8” particle board is suitable for stapling W.C.    paper on
Pocketknife--old one with blunt tip (Boy Scout Knife); used for removing staples and also for scraping into watercolor
H.B. Pencil --(drawing and Art Gum Eraser or Kneaded)
Credit Card-- any old discarded one (if available) or similar plastic card, For scraping
Tray-- 11”x 15” WHITE enamel butchers tray or any white enamel lid, plate (white china plate O.K. Or palette with deep wells.
Paper Toweling-- (white) or Kleenex etc.  Old cloth diapers are excellent
Brushes-- 1” Aquarelle flat brush
                     No. 6 or 7 round brush
                     No. 4 round brush
Paper-- D’Arches-140#(lb) Rough (Buy either large sheet which will be divided into four parts, or buy block- 25 10” x14” sheets)  I  buy the large sheets, cold press
Paint-- suggest Winsor and Newton but Grumbacher okay too. I buy the tubes of liquid paint and squeeze them into the wells of a palette and then wait for them to dry. I then reconstitute them with water when I'm painting. (Kind of like the Crayola kids paints) I would also suggest that in order to get the best results you buy the professional grade of the paints. They are more expen-sive but well worth it. If you want professional results you have to use professional products.
You'll never know how good you can paint unless you use good quality paints and paper.
I also when squeezing out my paints keep the cool colors together on my left side and warm to-gether on the right. You could switch this but keep cool together and warm together.
*French Ultramarine 
  Winsor Blue
*Cerelean Blue   
*Indigo Blue      
  Sap Green         
  Winsor Green         
*New Gamboge Yellow                  
*Raw Sienna
Alizaron Crimson
*Burnt Sienna
*Van Dyke Brown
Paynes Gray
Sepia Umber (Grumbacher)
Thalo Violet (Grumbacher)

* Suggested for beginners

Additional tools:
sea sponge for texture
Firm bristle brush for splattering
Friday, June 24, 2011

Watercolor Series- Art Background

I'm thinking of doing a Watercolor series and I thought I'd start with my "art background."  My Grandmother on my father's side was a Watercolorist.  One of the best.  She spent years learning and teaching it.  Studying under Clive O'Leary, Lee Weiss, Claude Croney, Zoltan Szabo, Tom Hill, Frank Webb, George Cherepov, Tony Van Hasselt, and Betty DeMaree.  My father was an Art Teacher at Alta High School.    He learned from his mother as well taking workshops with alot of the same people as my grandmother.  He taught Watercolor lessons at night in our basement and sold paintings on the side to help make ends meet.  We were always taking paintings to various art shows.  As far back as I can remember I had a set of Watercolor paints.  Crayola when I was younger, and on my 10th birthday I got a set of the real deal Watercolors and brushes. ( Grumbacher and Windsor and Newton) most of which were hand me downs from my grandma and father (which I still have.)  I also got a coupon (at said birthday) to attend Watercolor classes in my basement with about 6-8 other people, (mostly older ladies.)
I took art classes all through Junior high ( Drawing and a stage building/painting class), and High school.  In high school we had a block schedule where you have "A" days and "B" days.  So you attend half your classes on an "A" day and the other half on a "B" day.  My senior year I had it arranged so I spent all of my "A" day and half of my "B" day in Art.  I took Painting and had 2 back to back drawing classes and AP (Advanced Placement)Art.  I received an Art Scholarship to UVSC where I took 3 painting classes and a couple of drawing classes.  I was planning on a career in teaching art like my father but youth and stupidity got in the way.  I dropped out and  went to work for my uncle in his Dental Lab making (sculpting teeth out of wax) to be turned into crowns.  I did that until my first child was born.  Didn't do a whole lot of drawing or painting during the next 5 or 6 years mostly due to very young children and the fact that I didn't have a space to do it.  I'd always get the paints out to do Christmas cards every year and would hate the fact that I was "no good " at painting anymore.
Last year we finally moved the kids to a room in the basement and that freed up a room upstairs that we turned into and office/painting room where I could leave my stuff out.  I painted more often but not a lot.  I started this blog in September of last year and I finally had a creative outlet.  Even if nobody was looking at it it forced me to create again.  5 months ago I set myself a goal to, every Wednesday (Watercolor Wednesdays) post all of the painting I had finished that week.  It forced me to be painting every week and my art work is showing the practice I've put in.
A few weeks ago I found a blog where I can link up my art work with other people around the world.  It's nice to have a place I can share my art work finally and see others work and get inspiration that way.