Showing posts with label Gardening. Show all posts

Sunday, June 17, 2012

Beautification Award

On Friday evening we came home to find a sign in our yard.  Max thought it was a For Sale sign.  Ha ha!

We received a gift card to a local nursery, although I have no idea for how much.  The card doesn't say.
Although I am flattered to receive the award and really quite embarrassed, I can't wait to take down the sign.


Thursday, March 29, 2012

Backyard Project

I apologize for not being able to see this all from a distance, but we have a swing set in the way.  Maybe when we've moved the swing set, and the trees and bushes and flowers have got leaves I'll post some pic again.  When we rented the sod cutter  for the front yard planting area ,we cut a big long (70 ft) planting area in the backyard.   I have worked on this project 8+ hours a day all week.  My back hurts, my hands have callouses and my face is sun and wind burned, but dang!  It looks good!  I can't wait to one day finish it off!  Only about 12 more phases (years) to go.  But hopefully now we can start enjoying some shade, or at least be on our way to have some!


That's it.  All 70 feet of it.    No painting or sewing or anything this week.  But that's okay, cause this is another way I enjoy creating!  There is something very satisfying about gardening.  I love to be outside and taking care of my yard.

Sunday, March 25, 2012

Phase 5 of our Yard


Since we moved into our house 5 years ago, I've had our yard plans drawn up.  Each year we have done a section.  We got another one done this weekend and I am so happy with it.  It has haunted my dreams for the last 5 years and now it is a reality.
We rented this beast from Home Depot.
(I'm glad Jarrett ran this thing and not me)

The kids helped too.


This is a worm family.  Courtesy of the kids.


We've got a couple aspen trees, an american redbud tree, a forsythia bush, 2 spirea and 2 other bushes that the names have escaped me.  We moved our mailbox over 3 feet so we don't have to worry about hitting it every time we pull out of the driveway.  Anyways I am happy.  Two more phases and the front yard will be done.  We've got one more planting area and we want to widen our driveway so that we can park side by side.
Come on spring!

Tuesday, September 6, 2011

How to Blanch your Green Beans for Freezing

Why blanch?  All fruits and vegetables contain enzymes and bacteria that, over time, break down and destroy nutrients and change the color, flavor, and texture of food during frozen storage. green beans require a brief heat treatment, called blanching, in boiling water or steam, to destroy the enzymes before freezing. Blanching times for beans is 3 minutes (the duration should be just long enough to stop the action of the enzymes and kill the bacteria).
The great thing about blanching your beans is that you can freeze them and eat fresh tasting green beans all winter long.
First get some green beans.  Mine came from my garden but you could use store bought.  Refrigerate them if you aren't going to use or freeze  them immediately.  Don't wash them until you are ready to use them.

 Wash them off.

Cut off the ends

Then cut them to whatever  size fits your fancy.

Boil a pot of water and them drop them in.  Boil about 3-5 minutes depending on the size of the beans.

Pour off hot water and put them immediately into ice cold water.  My pictures of the beans in ice water (yes put ice in the water) didn't turn out but I'm sure you can picture it.  Keep the beans in the ice water for the same amount of time that they were boiled.  So in my case 3  minutes.

Then I pour off the ice water and dry the beans off on paper towels.

Then put them into labeled freezer bags and freeze making sure to lay them flat until frozen. The get all clumped together if you don't. If you have a food saver that would be awesome to use.  I don't so I just use freezer bags.

Thursday, August 11, 2011

Corn's Ready!!! How to Pick and cook Corn

 Remember when I planted my corn....way back on the last frost day?  May 10th!  Well Harvest time is here!  Look how tall it is now!  It's amazing how something so big can grow from something so small!  It amazes me every year how seeds just know what to do.  I love seeing all those tall corn stalks.  Plus they make a cool forest for the kids.
 To tell when you corn is ready.  (Now this is for Sweet Corn)  You want to make sure the ears feel full and plump (I like that word) and the silk that is exposed should be completely brown and dry.  If you aren't sure, make a slit in the husk with a knife or peel back the top a little and stick your fingernail or knife in one of the kernels and the liquid that comes out should be translucent not opaque or watery.
If your corn meets those standards it's ready to be picked.  The explanation of how to do this is more complex than the action really is.  Grab the corn and pull it back (away from the stalk) and down(toward the ground) in one motion.  I usually grab  the corn with my hand upside down thumb pointing down. Then to completely release the corn lift it straight up.


Now on to cooking these babies.  Fill a large pot with water and add 1/2 C. of sugar and stir until the sugar is dissolved.  Once the water is boiling add the corn and cook for no more than 8 minutes.  Remove from the water and slather in butter and salt!  Yumm!

Tuesday, June 28, 2011

A Fence Finally!

Here is a photo of how it looked before.  I never took a before picture of that hideous scene and I'm actually pretty surprised I had this one.  I usually purposely took picture from a different angle as to avoid that scene.  Our neighbors over there are really quite nice.  They are an older hispanic couple and are rarely outside.


Here's how it looked after we tore down that monstrosity of a "fence" we had before:
 See where that 3 foot grass is?  That's where the borderline was.  We actually have an extra foot now in some places because that other fence was so uneven.


 And here is the finished product!  Much improvement don't you think?

Friday, May 13, 2011

Garden Improvements

So remember a few weeks ago when I said that I had been really busy outside and hadn't had time to blog? We'll now that it has finally stopped raining I  took some pictures of what I was up to.  I was planting flowers and getting the garden ready and I used up our old stepping stones (that used to be in our front yard)  See HERE.   They've been stacked (and not neatly I might add) around our garden for the last 6 weeks.
I thought about laying them out and making a small patio to put our grill on but couldn't decide where to do that. (At least not somewhere that wouldn't need sprinklers to be moved.)  So I finally decided to put them around our garden so I wouldn't have to walk around on the dirt, and weeds that inevitably grow up all around the garden making it look horrendous.

Here our newly planted corn


Here is one side of the garden with the stepping stones laid out around it.  It's going to be very nice this summer.


Finally got the twine up for the peas to grow on.


Another side to the garden.


Monday, May 9, 2011

Almost all the Rest

So can you believe that the last (supposed) frost date is here?  Today's the day to plant ALMOST everything else in your garden.  Beans, Corn, tomatoes and squash.  Cucumbers are supposed to wait until next week ( a week after the last frost date.)   Although it has been known (last year and the year before) to snow the week after.   So waiting until next week might not be so bad.  Since it's raining here today and for the next couple I'll probably wait until Wednesday to plant my corn and beans.  I also always plant marigolds with my garden.  They are supposed to keep away pests .  They seem to work.  The last few years our garden has been great, even when neighbors have complained about bugs in theirs.  I give complete credit to the marigolds.  Click HERE to learn more about companion planting.  I always just buy the marigolds as seeds and then harvest the seeds from them in fall and then re-plant again in the spring.  But you could buy some pre-grown ones from a nursery.  But I'd highly suggest planting them, next to, if not in your garden.  They not only keep away the bugs, but they add color to your garden and make it beautiful to look at.

Corn gets planted one to a square foot and I usually devote 16 squares for corn.  I just lay a 4x4' grid directly in the dirt and plant them in the ground.
Beans,  (Mel Bartholomew creator of Square Foot Gardening) says one to a square, but I have done two in a square the past 3 years and have been fine.
Cucumbers two in a square foot
Squash needs one plant, planted in the middle of 4 square feet.

I also use Miracle Gro.  I buy the granules .  The individual little bags that are supposed to go in the feeders.  They come with a Tablespoon scoop with instructions for smaller feeding.  1 Tablespoon per gallon of water.  I water the seeds  (the first watering after planting) with Miracle Gro and then maybe twice a month.   Happy Gardening!

Monday, April 18, 2011

Radishes and Carrots


I'm actually a little late with this one.  Radishes and Carrots are good to go in the garden now.  They both get planted 16 to a square foot.  So 4 rows of 4.   I usually plant 8 (of each) and then wait  2 weeks and then plant the other 8.  I don't like having 16 vegetables to hurry and find something to do with before they go bad.
Carrots take a while to germinate.  So don't be alarmed when they haven't sprouted and the radishes have.  Just keep watering them and as with ALL seeds: don't let the soil dry out until after they've sprouted.  Seeds HAVE to remain moist or they won't sprout!   Plant Radishes 1/2 inch down and they sprout in 3-7 days and mature in 3-4 weeks.  Plant carrot seeds 1/4 inch down and they sprout in 10-17 days.  Pick carrots when they are fingerlike size for the best texture and flavor.   In about another month and a half or so you'll have a salad ready in your garden with the carrots, lettuce and radishes and the peas won't be far behind!
See my other posts about Gardening HERE.

Thursday, April 14, 2011

How to: Get a Weed Free Lawn

Every spring, I walk around the yard with one of these babies:
 Its a dandelion digger.  They often come in a 3 pack with a trowel and a hand held rake.   I got mine at Walmart.  All 3 were in a pack for $1.  You use it on one of these:
 First I move all the leaves together.  So I can get to the "root" of the problem!  Ha Ha!


Then you push it down into the earth around the roots.  You'll want to do it on all sides.  I usually just go around the weed until it is loose.


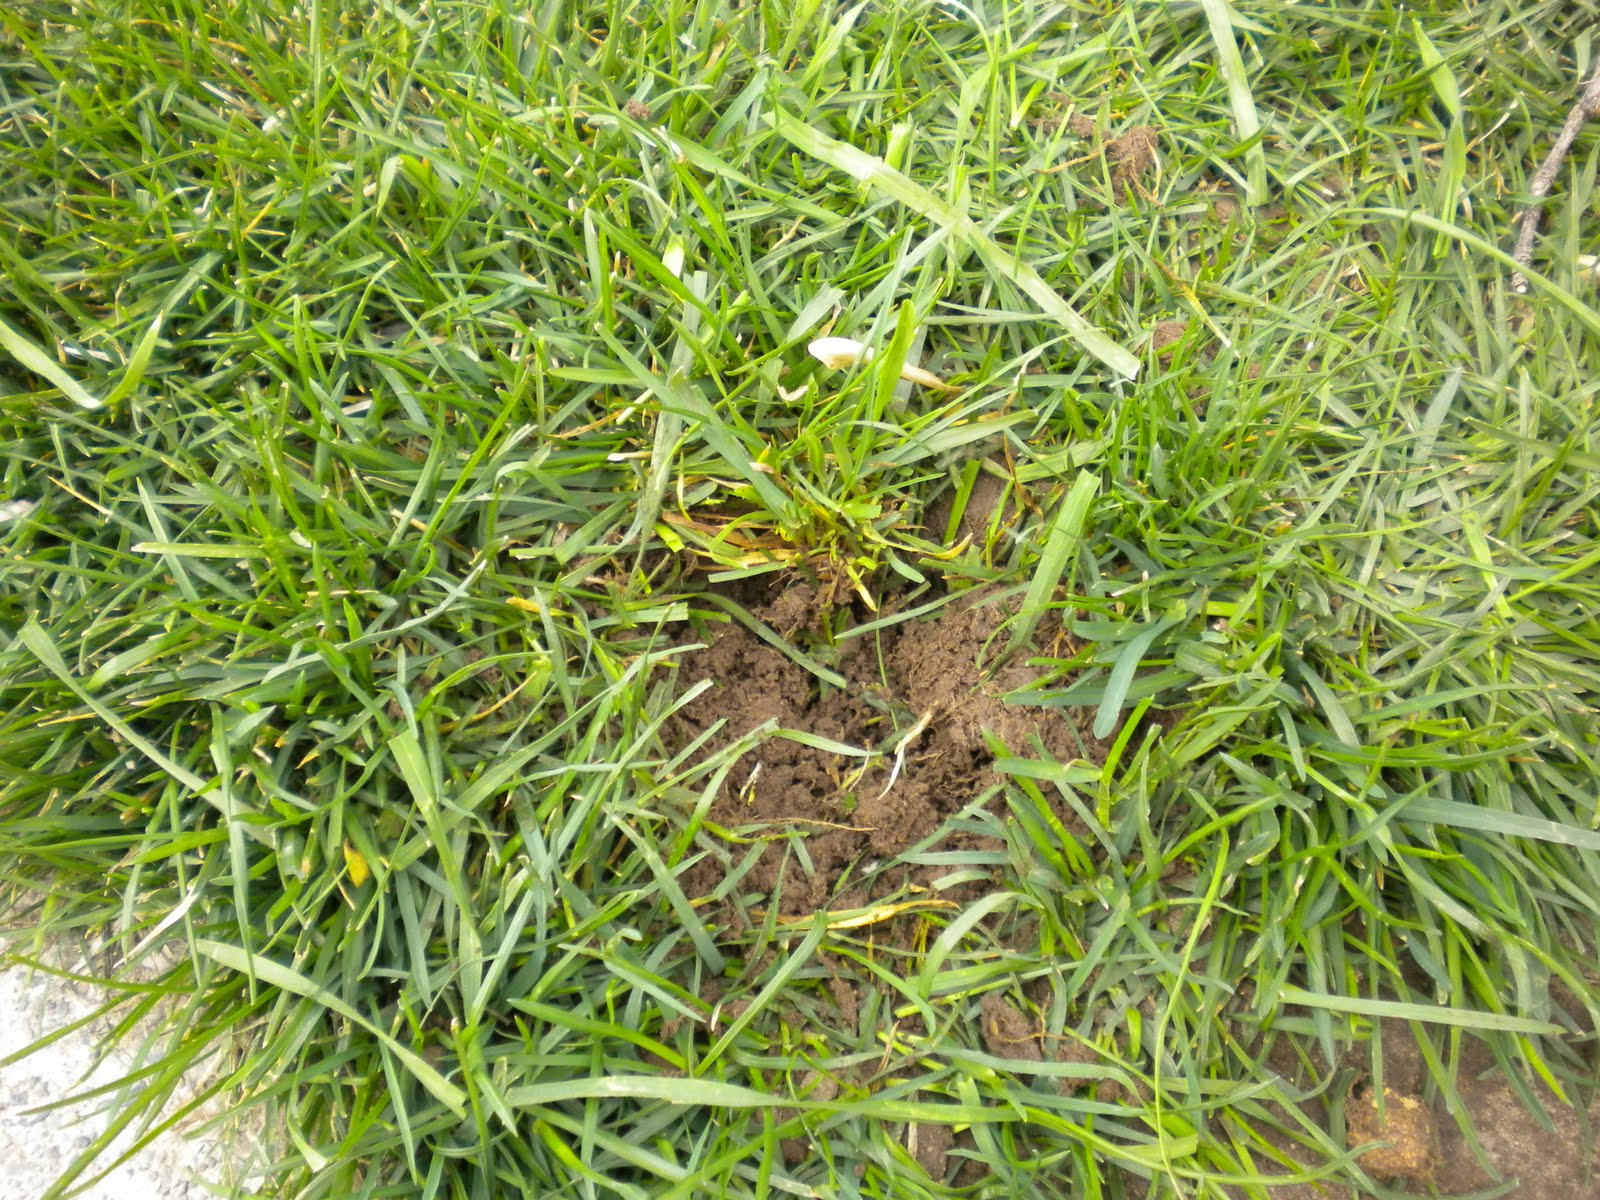
Here's how it looks when it's all loose:


Then you just pull it out, roots and all:


The grass will look like this:
 Just push the dirt back in, and  smooth the grass out and it's good as new.


Then there is the "crab" grass, or orchard grass.  You just do the same thing.   Use the dandelion digger and dig it out like the dandelion.   For large areas of crab grass, the only way to truly get rid of it is to dig it out and fill the area in with grass seed or sod.    Keeping your grass thick and green will "choke" out weeds.  If the lawn is so full of "grass"  weeds won't be able to find a place to grow.  Or very few will.  You keep it green and thick with water and fertilizer.  Click here on FERTILIZER to read my post about that.

  But if you attack these problems when they are small, it's easy to get them out.

 We also have some weird unidentifiable weed that are small and have really wiry roots.  I've never seen anything like them.  They start showing up every year about June.  They are in number probably in the millions.  I'm serious.  The first year we lived in our house I thought there weren't that many and I decided (mostly because we didn't have any money)that I would just pull them out by hand.  Three, gallon ice cream buckets later, they were still everywhere.  So I went to a local Nursery and went to the "weed B' gone" area and found Fertilome Weed free zone !!! view product HERE.  I use the one in the big picture that is showcased.  I put it into a hose attached feeder and sprayed the lawn with it.  Usually once in June and then again a few weeks later.  It works beautifully!    The complete instructions are on the bottle.  I like to use the concentrated kind that you have to mix yourself and put into a feeder and attach to your hose because it works the best and is the fastest way to take care of business.  I spray mine at night after the sun has gone down, which in June it's not until around 8:30pm.  Make sure that the week or so before you spray anything like this on your lawn, that it has been watered really well.  Or it  has a higher chance of burning your lawn.  If you've watered the lawn everyday and the grass doesn't look dry, it should be fine.  Then water again the next morning.  I think the packaging says that after 6-8 hours you can water.
The fertilome works really well, it kill over 80 different kinds of weeds.  I usually use it once in June and then depending on how many "wiry weeds" are left I'll use it in 2, 4 or 6 week intervals.  Not more than 3 times a year.
This weed killer won't kill weeds that haven't emerged yet.  It only works on weeds that are actually growing.